Once you go through the following process, your SmartCocoon fan will rely on Nest signals and will turn on and off based on the commands sent from Nest to your HVAC system.
If you already have one or more SmartCocoon devices on the app, you do not need to add them again; you can simply dedicate any room to any thermostat you want by following the below process.
Required SmartCocoon app version:
Your app needs to be at v1.25.1 (or higher). You can verify that by going to the settings page and seeing the app version on the lower right of the page. If you have older versions, please make sure to download the most recent version.
How to connect your device (s) to your Nest thermostat?
Please go through the following process:
1- On the SmartCocoon app, click the thermostat button in the lower center.

2- Click on "Connect thermostat"

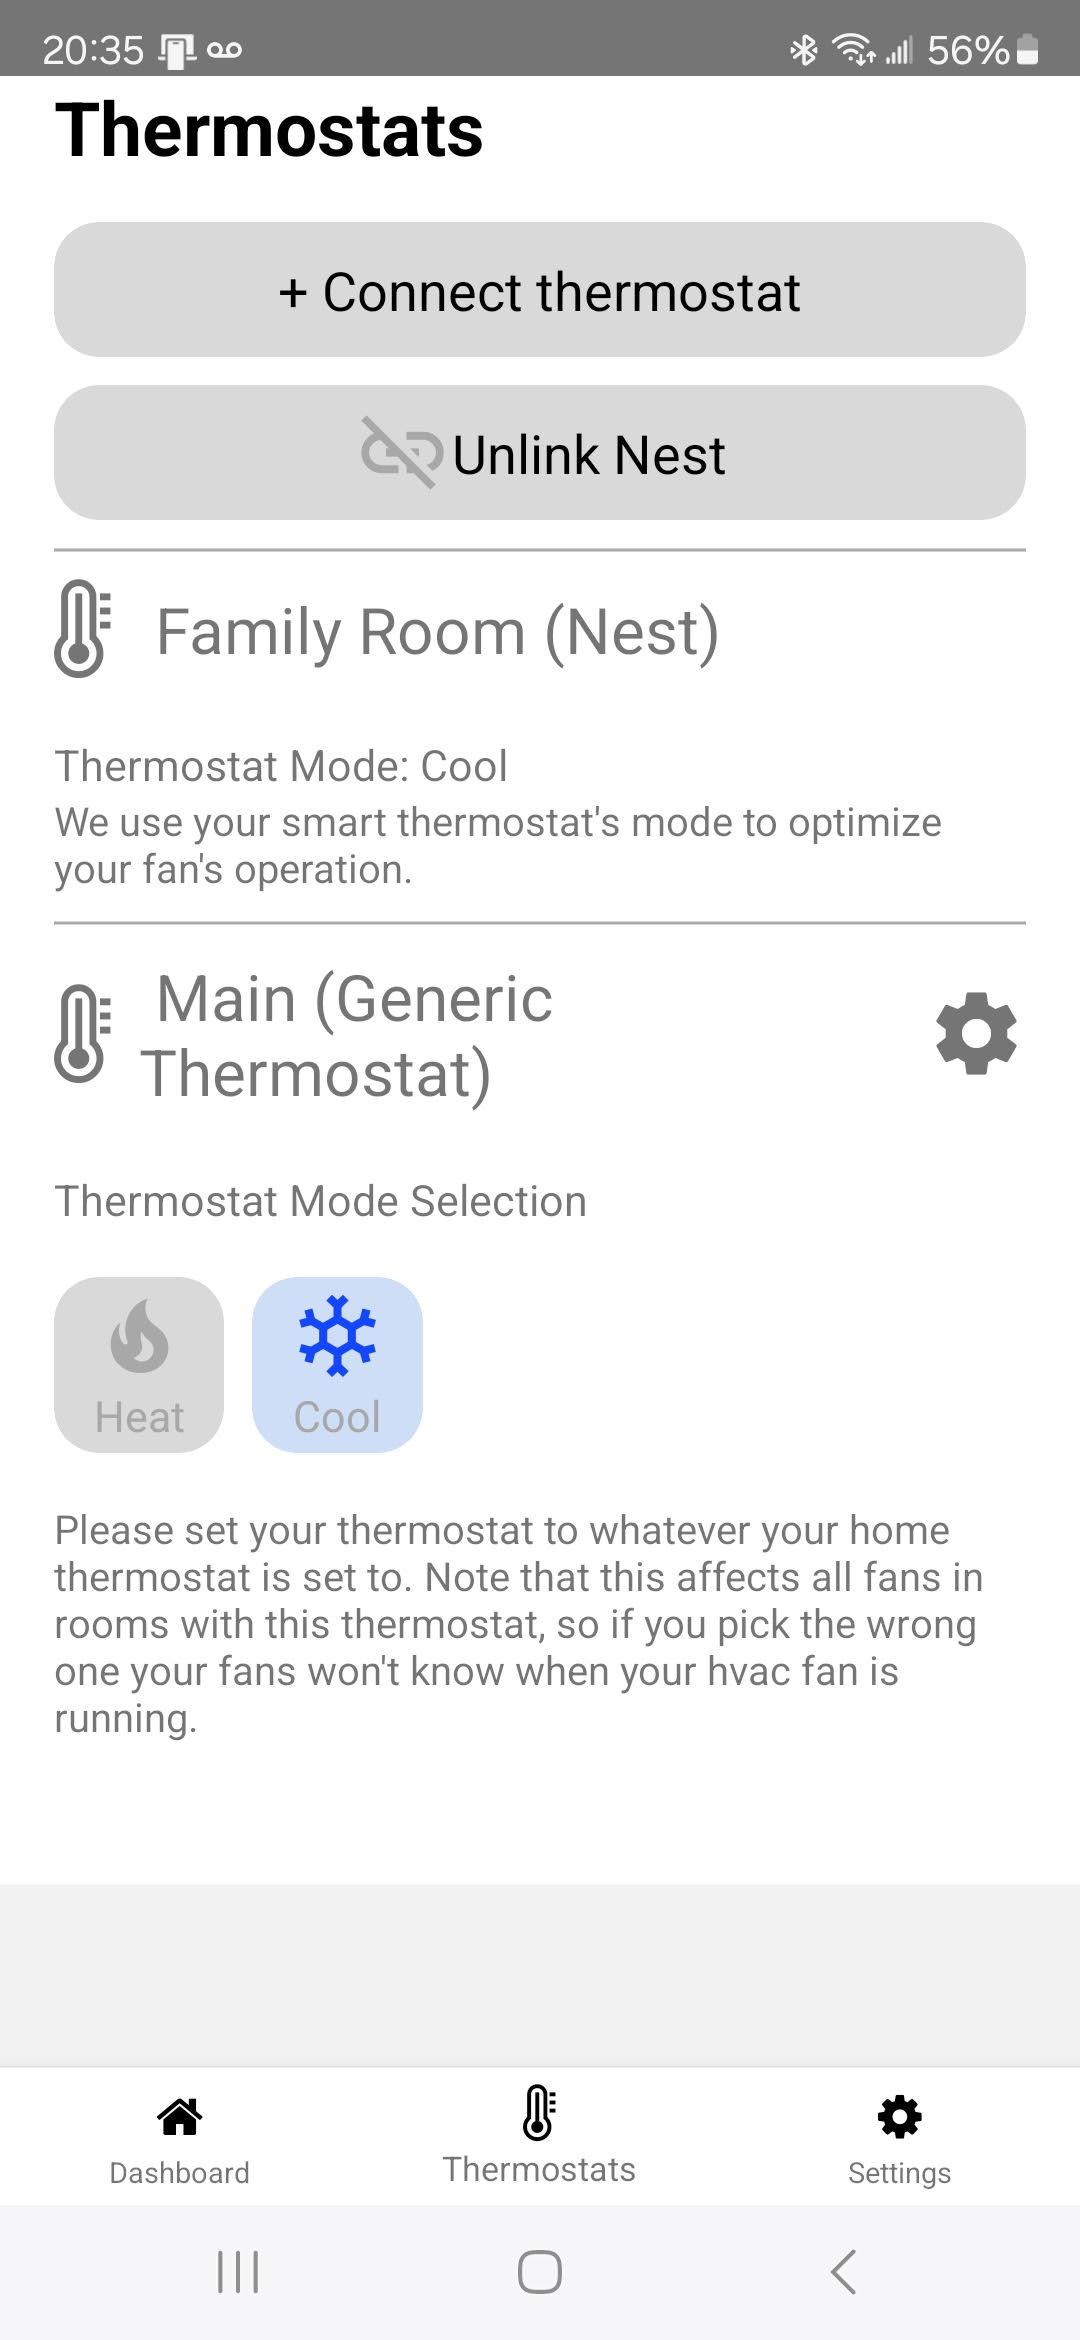
3- Go ahead and add your Nest thermostat. Please go with the process, take a screenshot, and send it to us if there is an error or issue. When your Nest is added, you will see this page:

Now your Nest is connected to the SmartCocoon app, and you only need to connect rooms to Nest instead of the dummy thermostat.
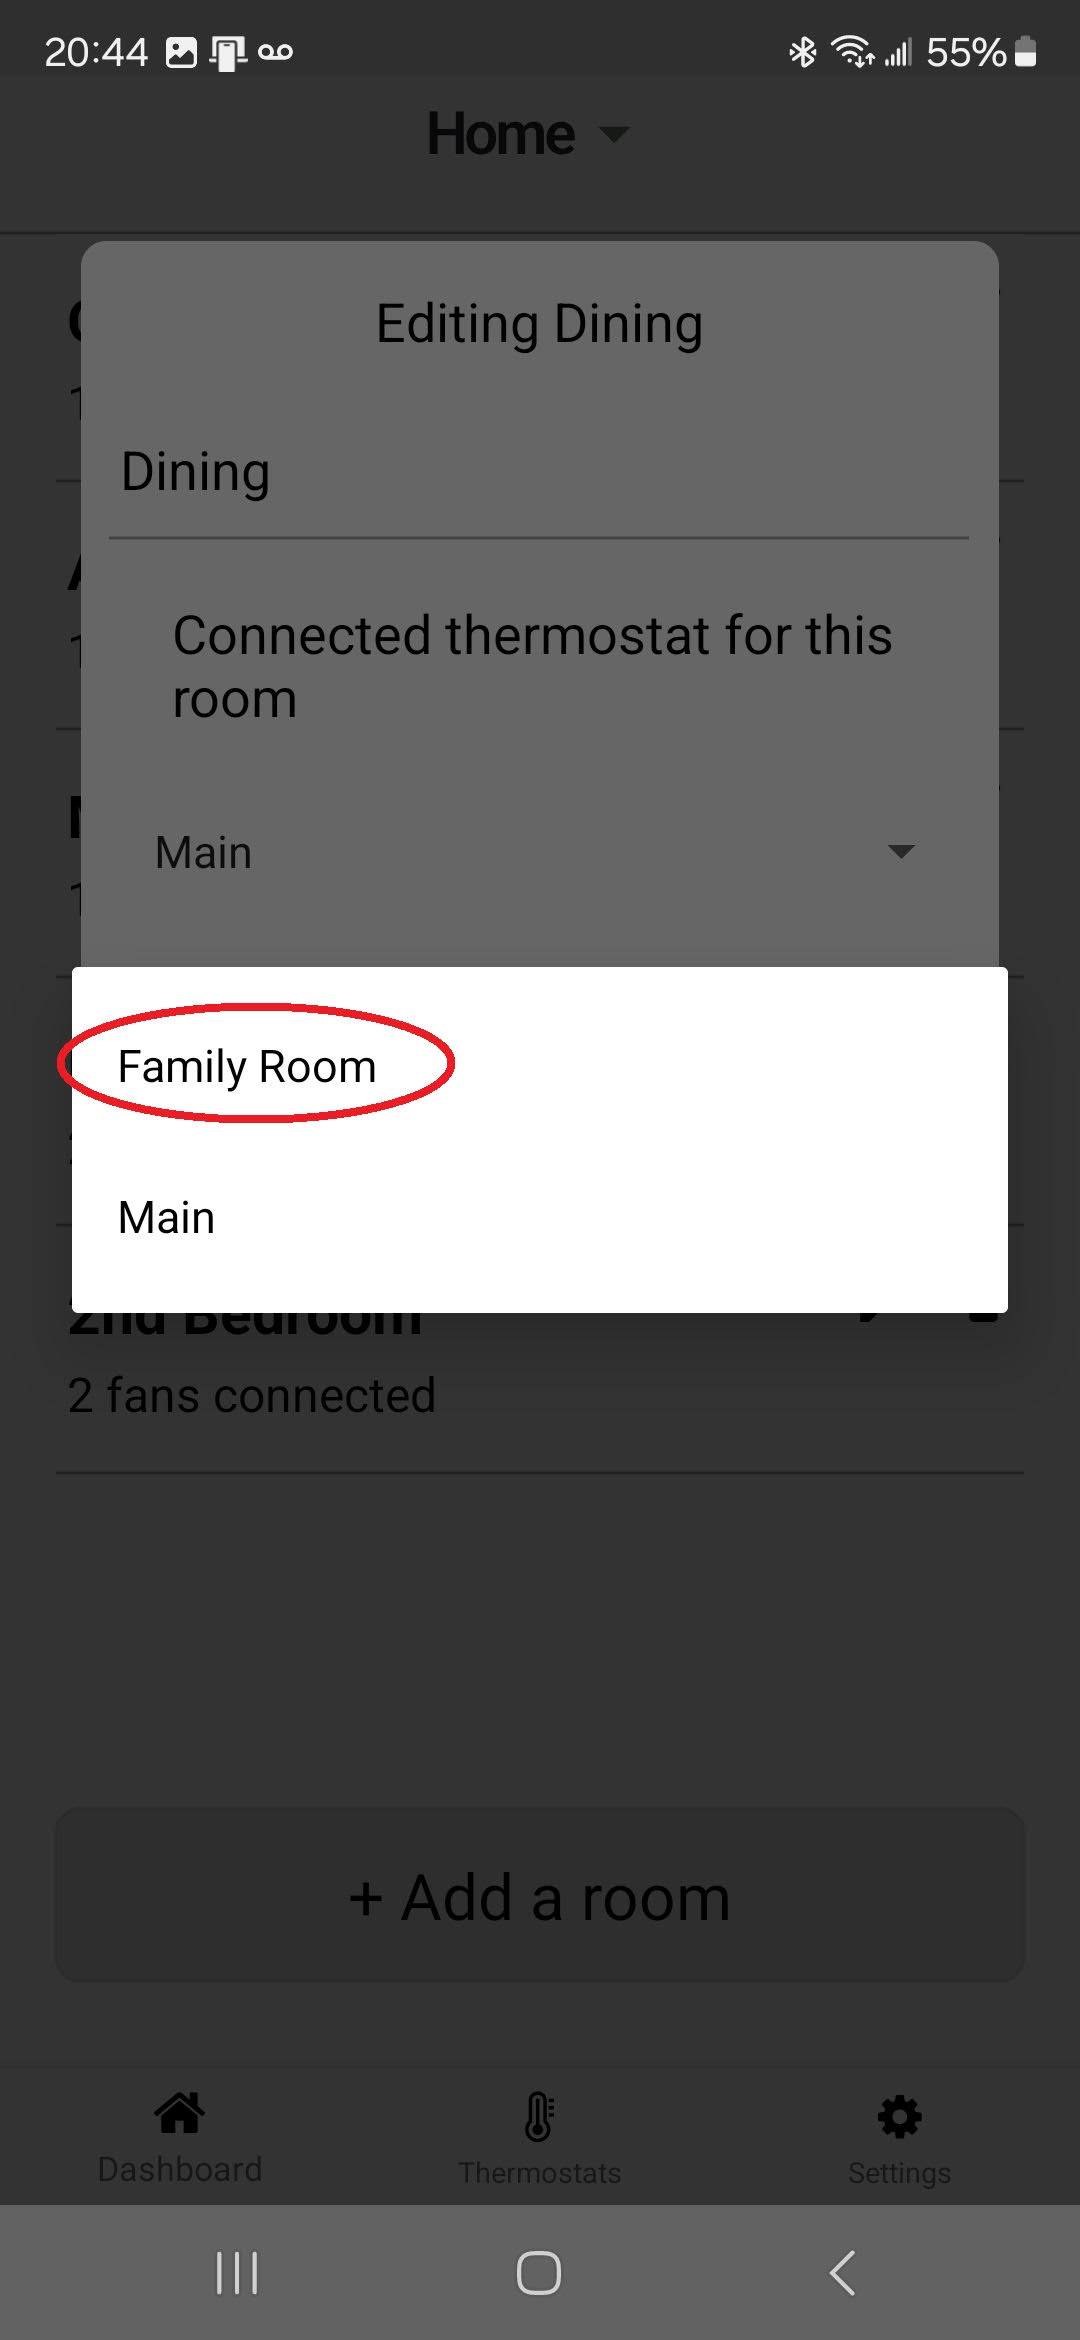
4—Go back to the dashboard, where you can see all your rooms. Click on the pen icon next to the trash bin. In this case, we are connecting "dining" to Nest

Then click on the drop-down menu and choose your Nest thermostat.


You are all set. All the devices in that room must only work when Nest is on cooling or heating.
